

How To Blog

DIY Bike Cable Clamps & Routing | Quick Fix
This is a bit of a random bike fix but I have found myself in this situation a couple of times throughout my bike mechanic times so thought I would share this simple cable clamp & cable routing repair. Here we have a bike that had absolutely no gear or brake cable guides left in the frame, nor did I have any to replace them with… Perhaps they wobbled loose or were stolen by a previous owner etc. etc. Either way here was my quick fix to get the cables re routed neatly.
This is a bit of a random bike fix but I have found myself in this situation a couple of times throughout my bike mechanic times so thought I would share this simple cable clamp & cable routing repair. Here we have a bike that had absolutely no gear or brake cable guides left in the frame, nor did I have any to replace them with… Perhaps they wobbled loose or were stolen by a previous owner etc. etc. Either way here was my quick fix to get the cables re routed neatly.

While what I have used here isn’t the most aesthetically pleasing fix it gives you the general idea and hopefully some inspiration to create your own cable guide clamps for your bike.

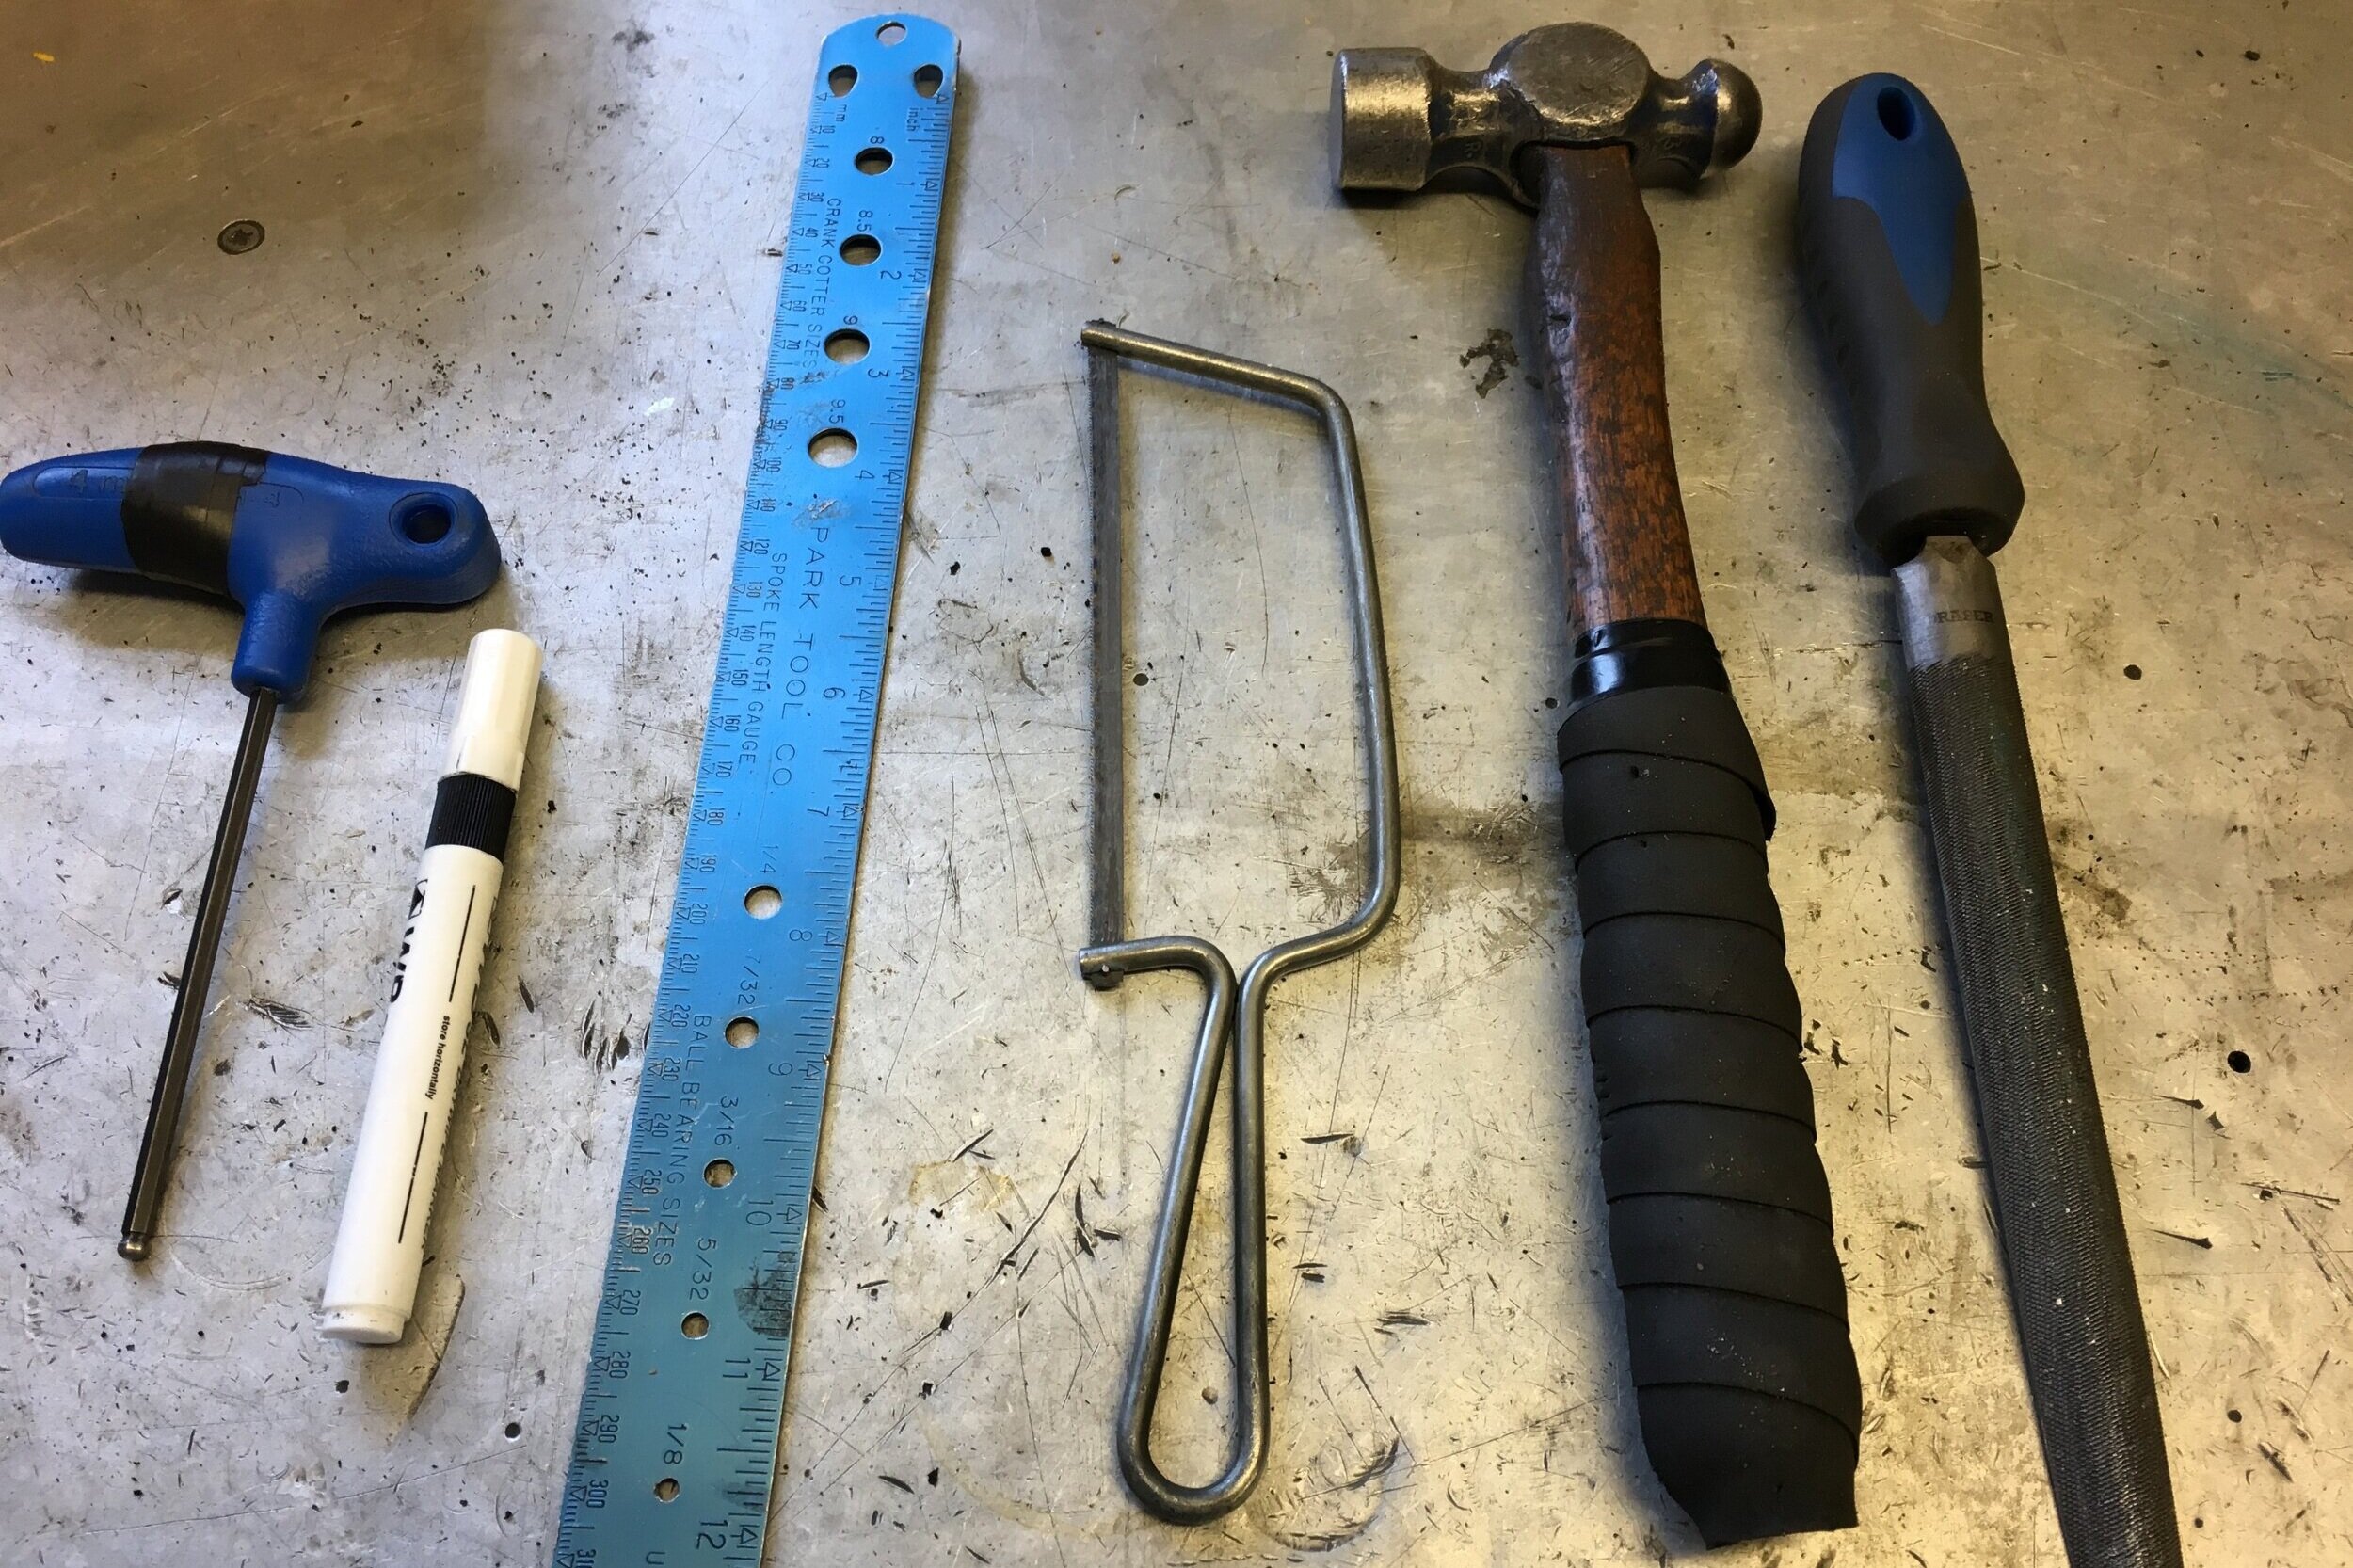
You will need for your cable clamps
Large penny washer or similar
Bolts to fit your frame recesses (m4-m5 usually)
Plastic cable tidys
Hammer
Hacksaw
File
General workshop tools will be helpful no doubt
Vice
Making Your Cable Clamps:


Start by cutting off the edges of your penny washer so it is more of a rectangular shape. Then tidy up the cut edges with a file, removing any burs.


Now pinch one rounded side of the washer in a vice and hammer until the edges are kinked. Rotate the washer and do the same to the other side. Again tidy up any sharp edges with a file to avoid any damage to your gear/ brake cables and bike frame.


Now moment of truth! Once you are happy with the shape of your cable guide, get your bolt and carefully thread it into the recessed hole in your bike frame. Align each of the cables appropriately underneath your new cable guide and tighten. Make sure you only pinch the bolt tight and do not crush your brake or gear cables.
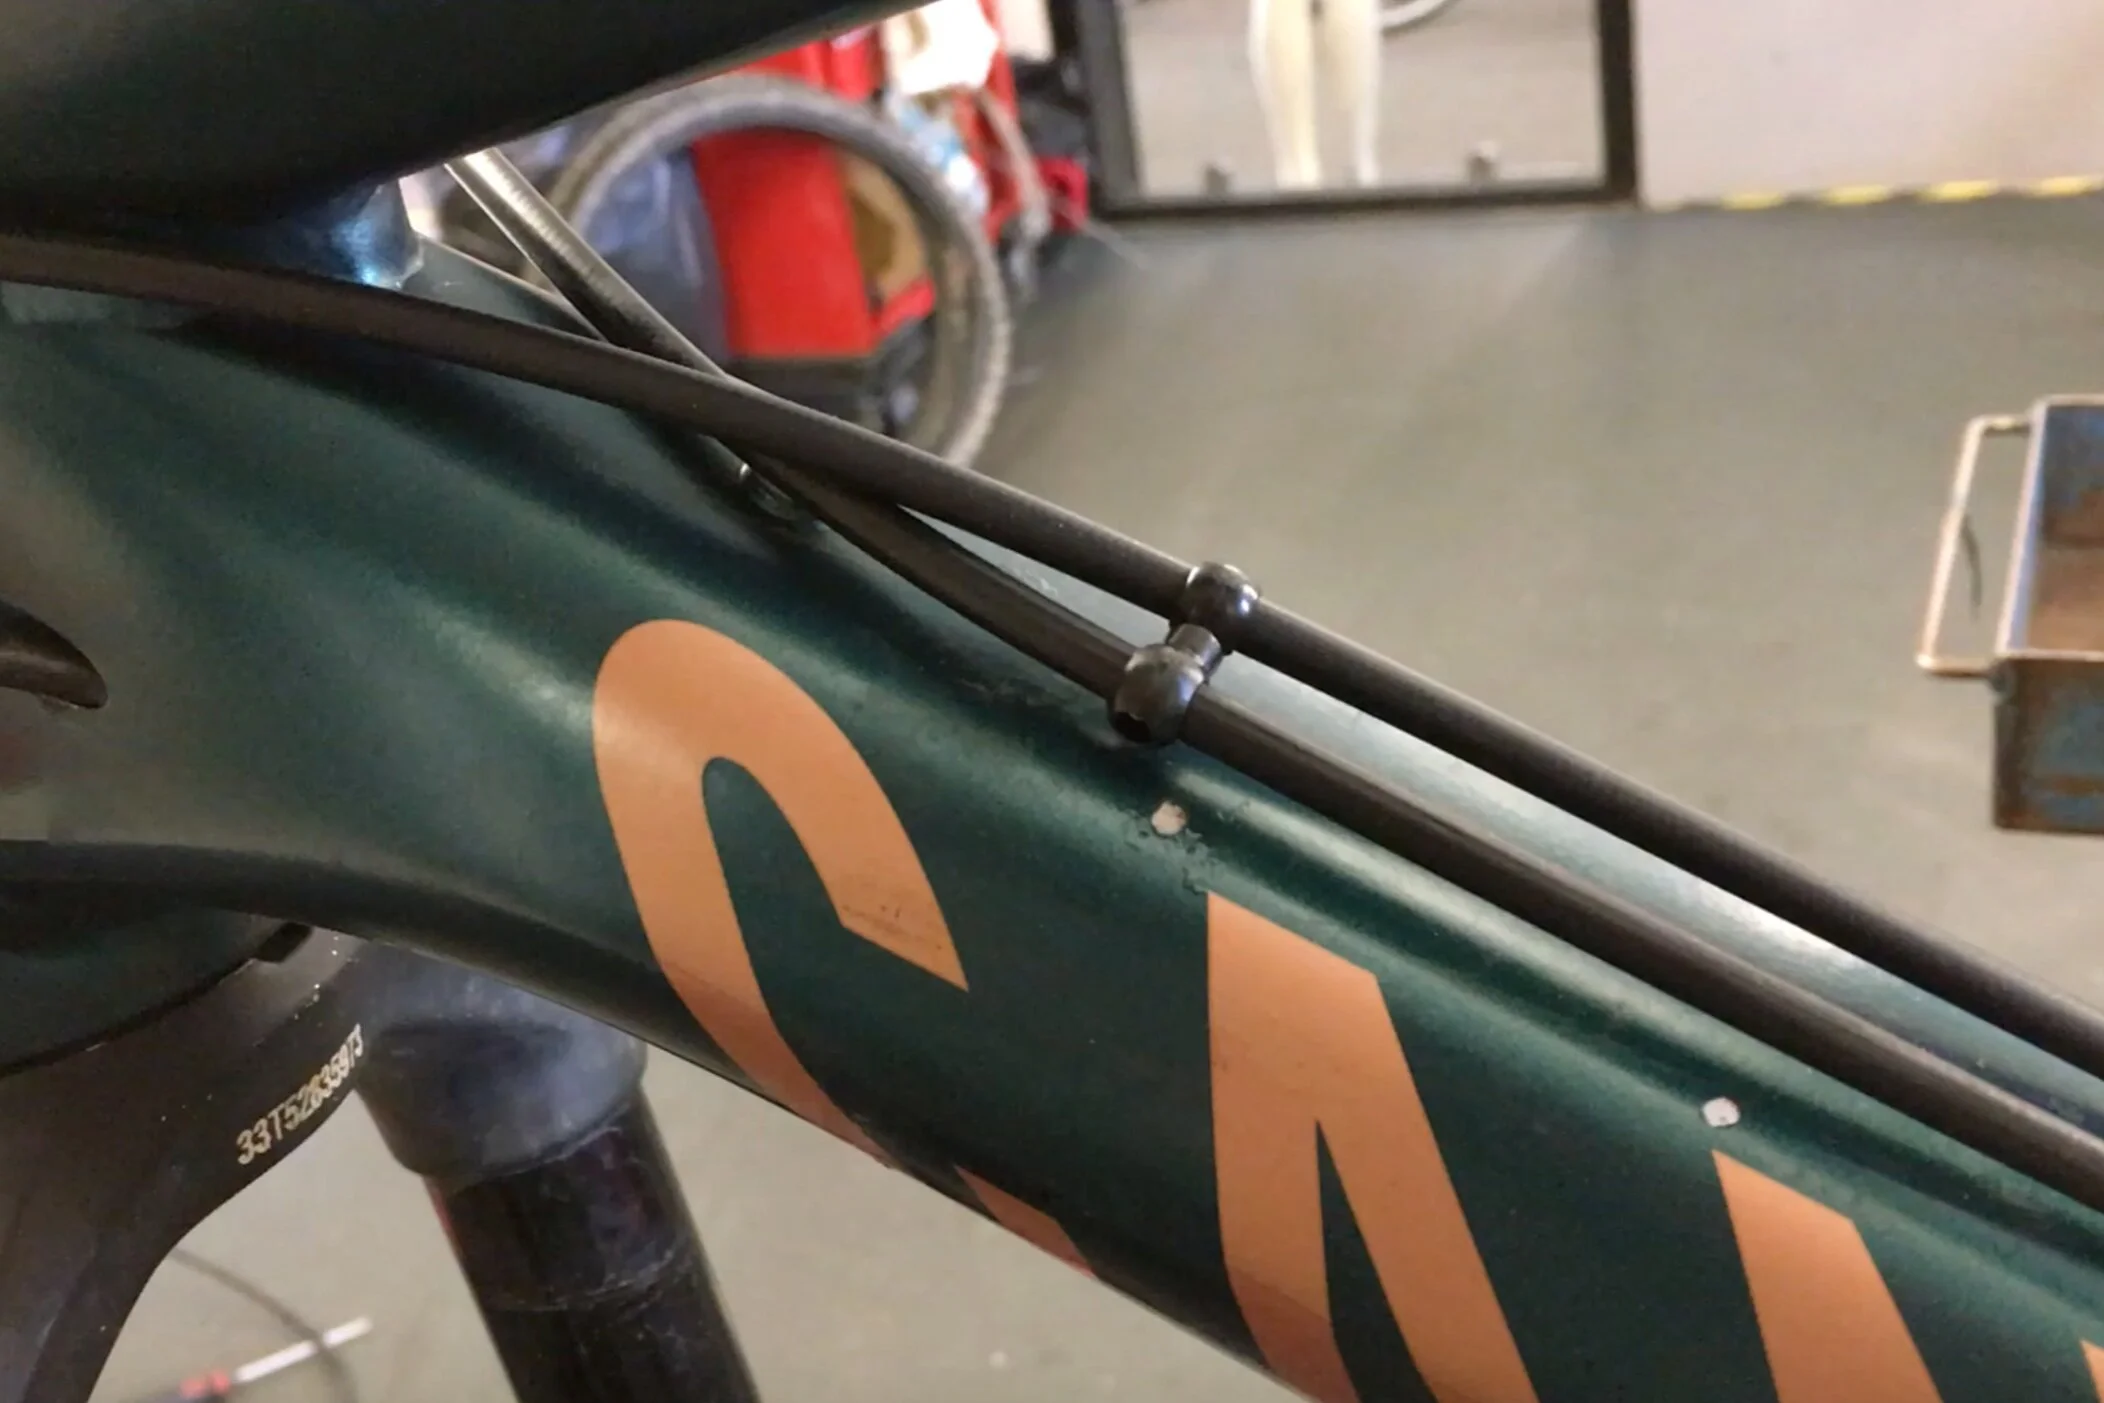

Finally you may find it useful to clip on some cable tidys to keep the cables running where you want them. Finally once you are happy take it for a test spin to see if everything stays in place.
As I said earlier this instance was only a very quick fix so isn’t the best looking. With some thought you could use coloured washers of even spray paint to match your bike!

How To Build Your Own Bike to Van Axle Holder/Hitch | For Bolt Through Axle
This bike to van axle stand is the perfect solution to holding your bike safely in transit.

If you are anything like me everything has to have a place, especially in the back of the van! I get so fed up when driving… You hit a corner and everything in the back of the van crashes together 🤬 This bike to van axle stand is the perfect solution to holding your bike safely in transit.
The axle stand or bike hitch is not a new invention, however I have found it really difficult to buy one at a sensible price that actually fits all of my various bikes, so have decided to make my own at a fraction of the cost. For those that are unfamiliar this stand basically replaces the front wheel of your bike and holds it in an upright position without the need for straps in the rear of your pick up, van or even shed.

You Need For Your Axle Stand
Metal Pipe of the correct diameter of your axle (I have used copper pipe)
Saddle Clamps x 2
Screws x 4
Screw Driver
Hack Saw or Pipe Cutter
Optional
Wood Block or Spacer
Additional Spacers
Smaller Diameter Pipe
Finishing Trim
Building Your Axle Stand:
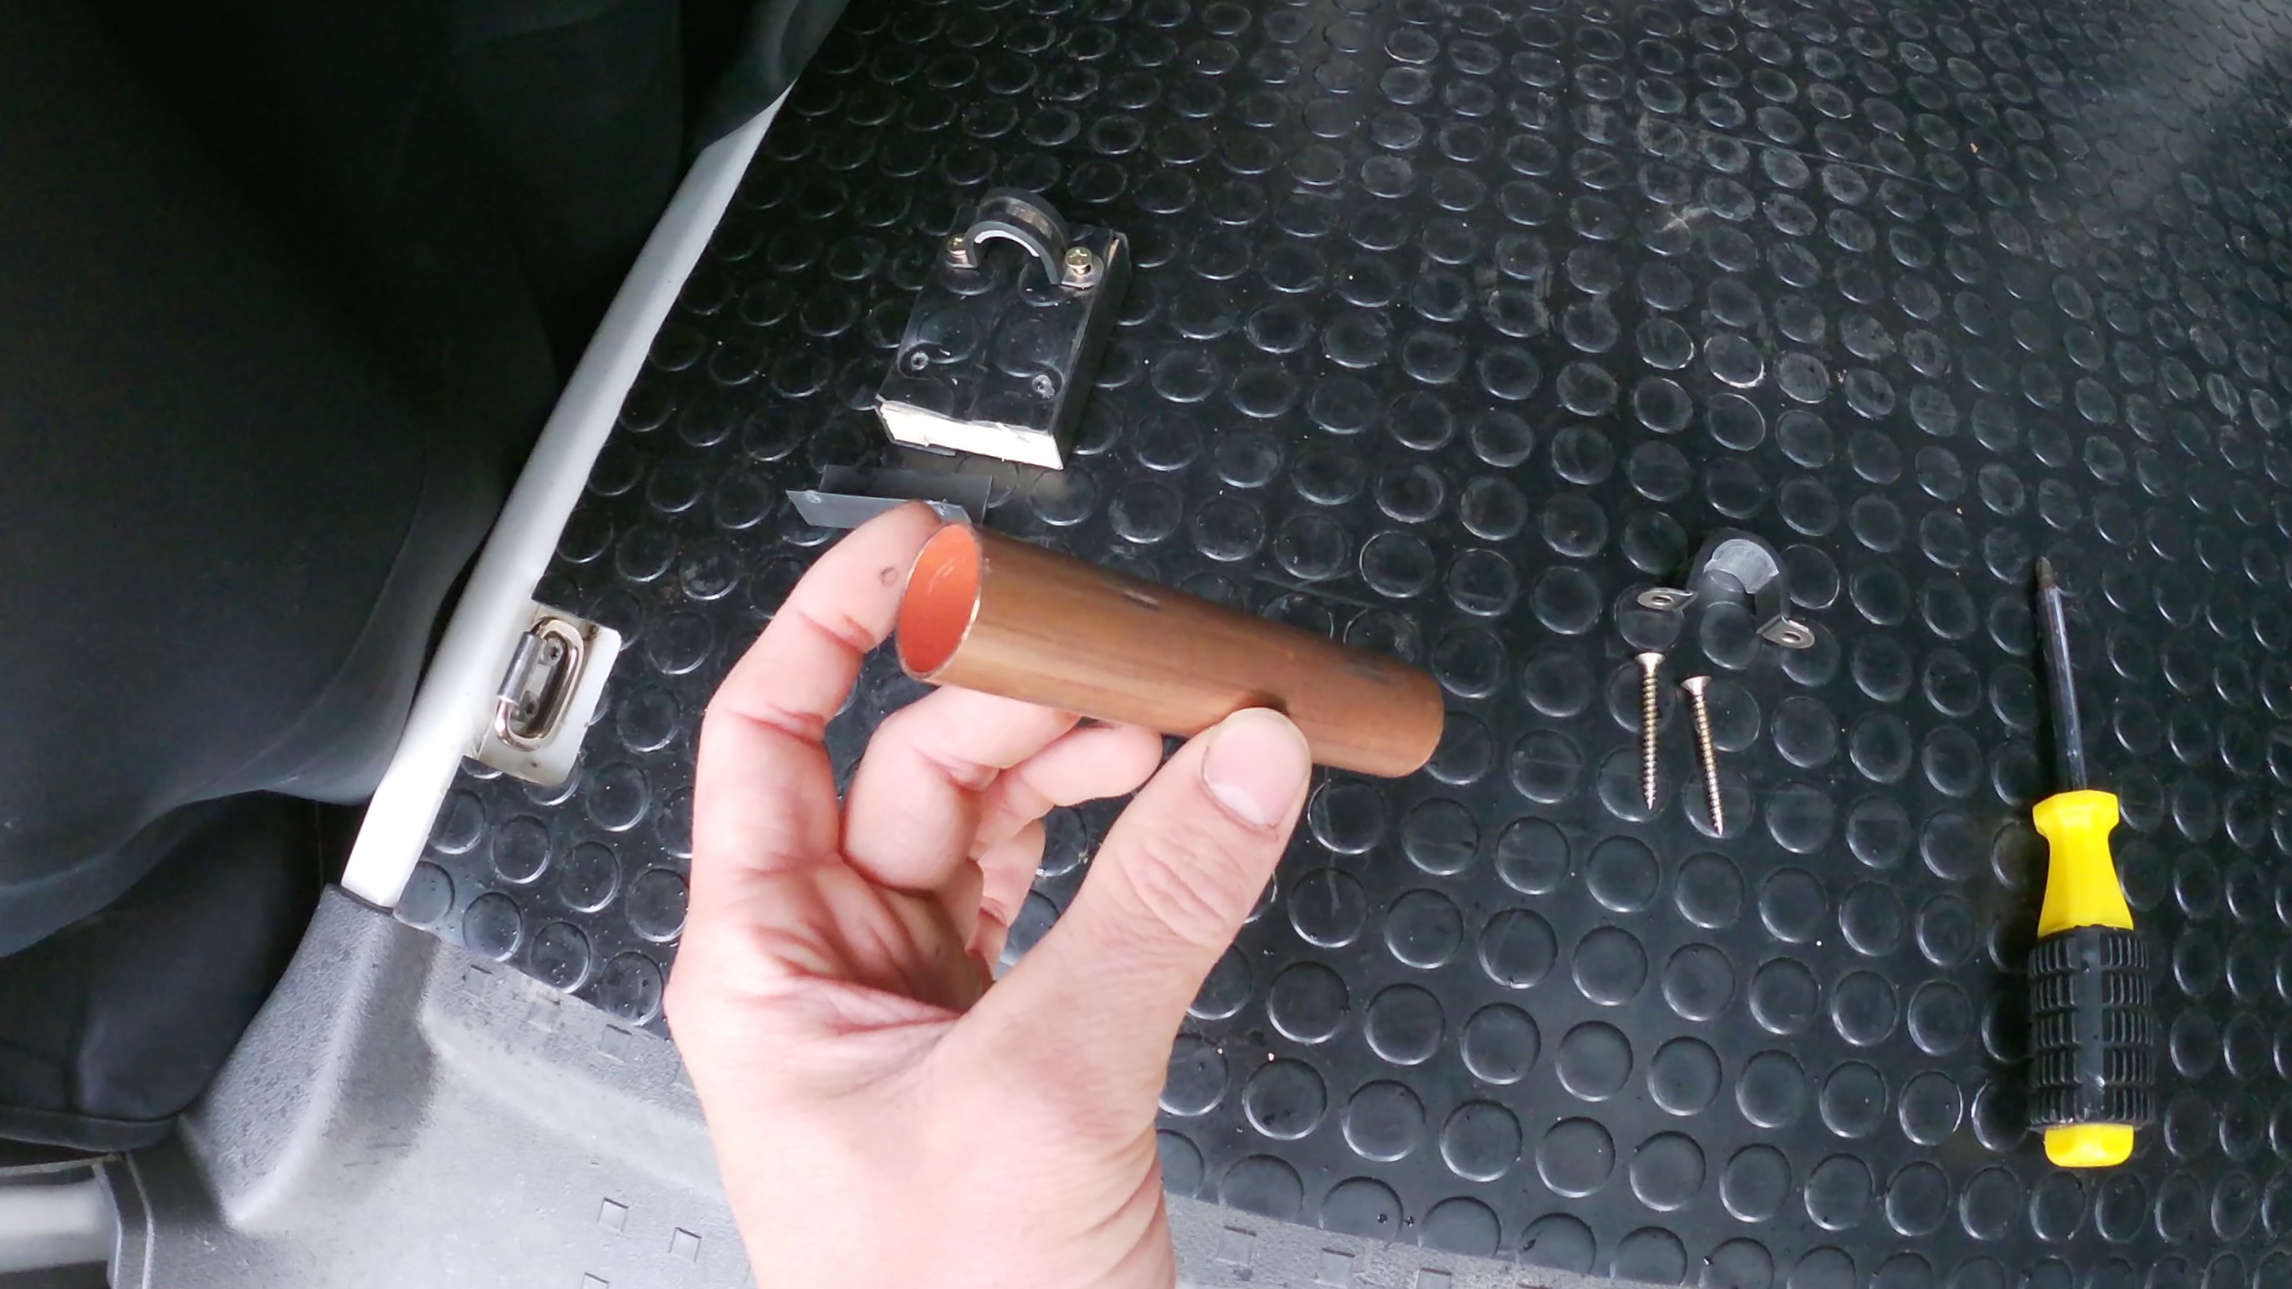
Firstly cut down your pipe to match the width of your forks (front hub size). As I have various bikes with different size forks I have cut it down to the smallest width I have and will use spacers for the bigger bikes.


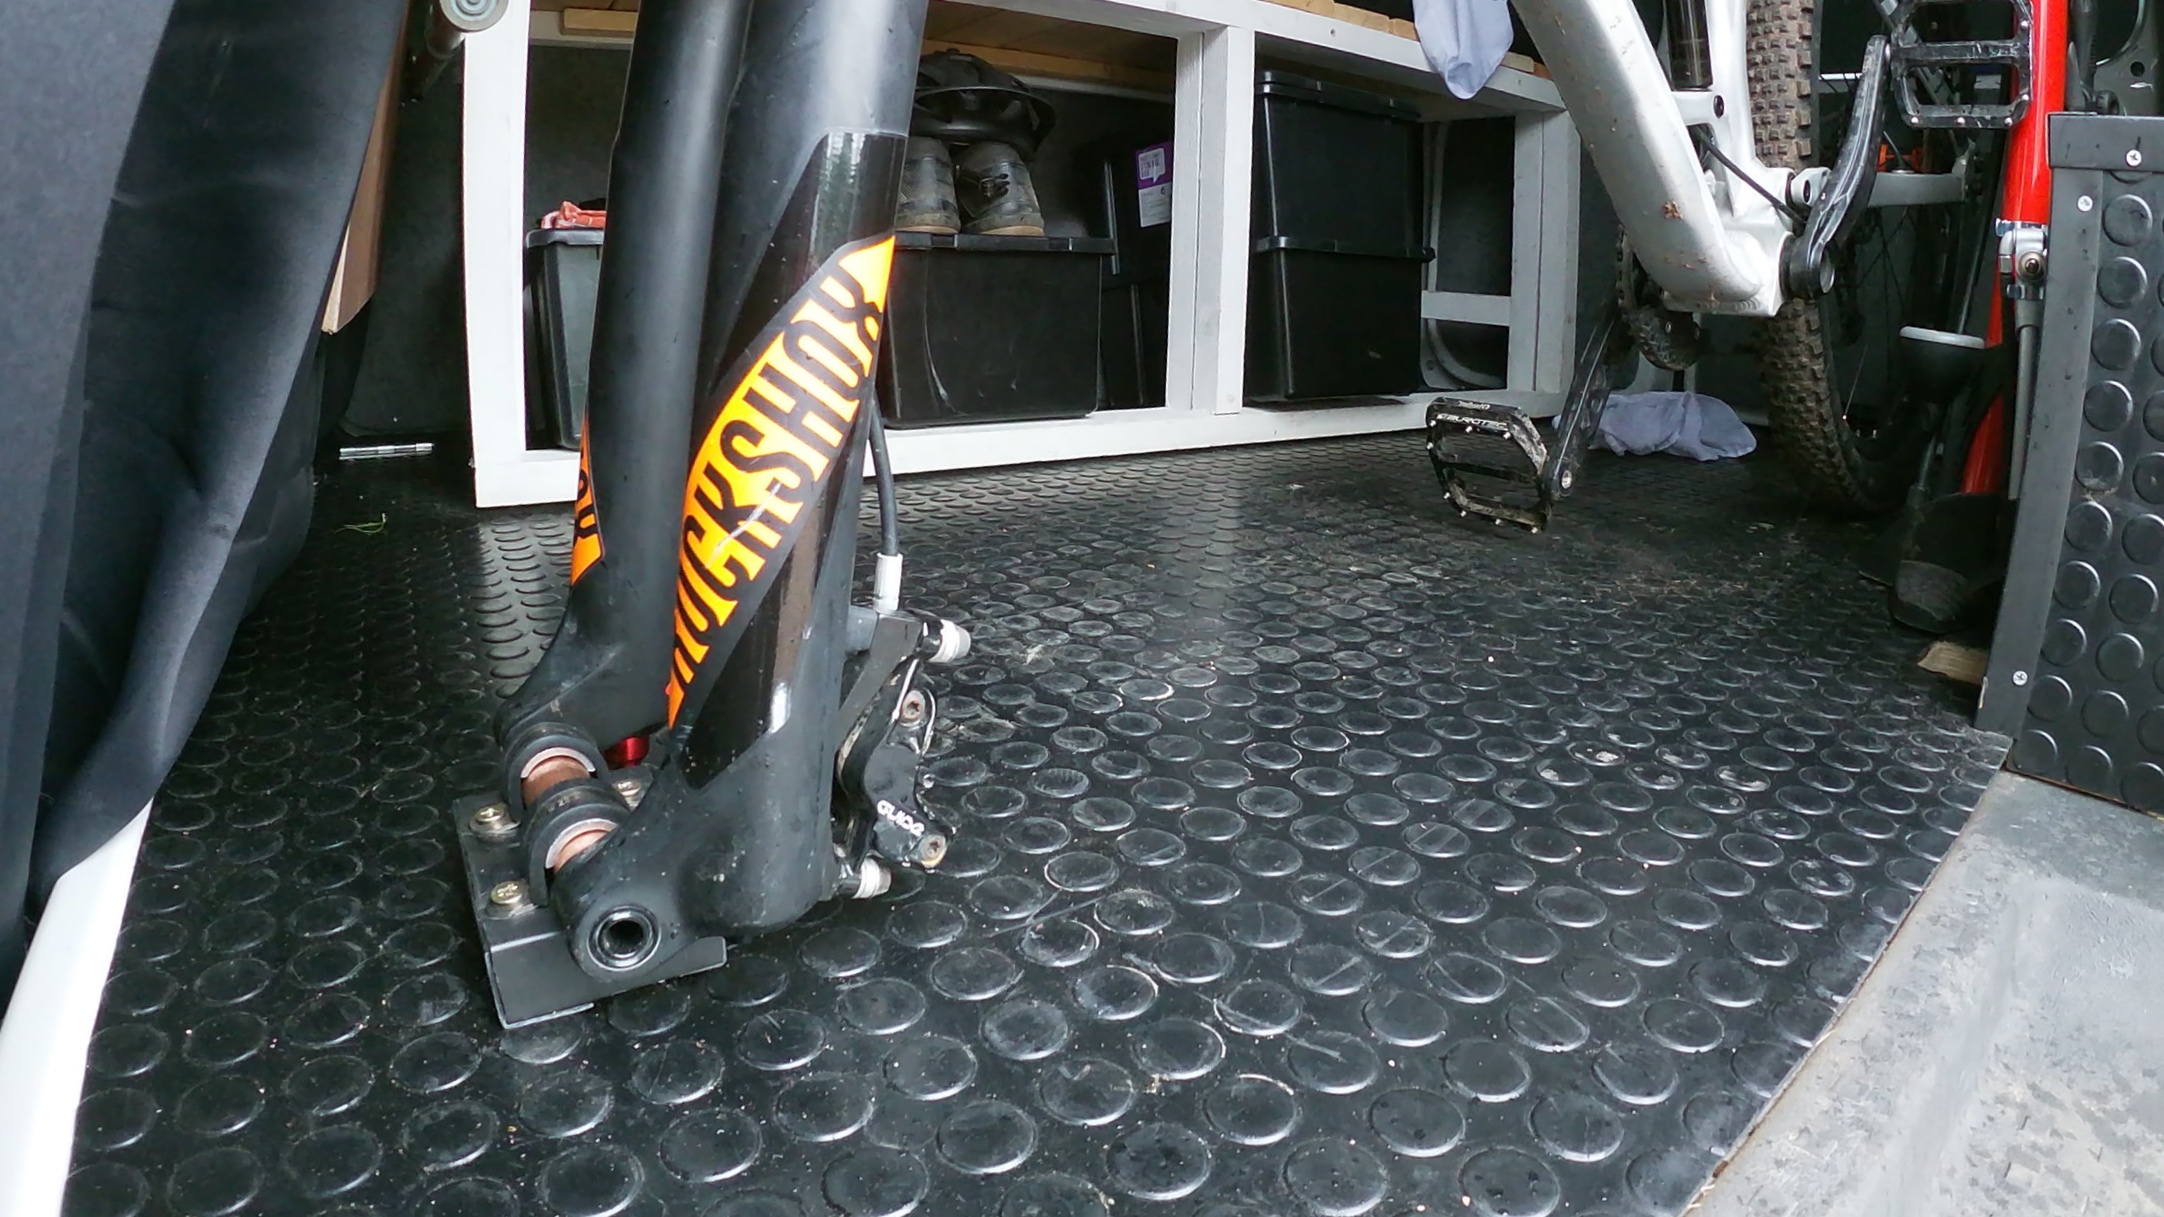
I have used a block of wood as a spacer to lift my axle stand off the floor to allow space for the damping controls on the underside of my suspension forks. This should be no wider than the pipe you have cut down.
I have also covered my wood in matching rubber and black plastic trim to be in keeping with my van interior

Finally decide exactly where you need the stand and screw down through the saddle clamps and wooden spacer into the van floor, ensuring the pipe is sitting in the right position… This can be fiddly!
Then you are ready to go! Using a small bungee i found was the best way to keep the spare front wheel in check.

Troubleshooting and Tips:
Double and triple check the positioning of the stand so that all doors can close etc with the bike in there!
If like me you have several bikes, getting them to all fit the stand can take some engineering… For example I have a 20mm axle DH bike and a 15mm Axle enduro bike. I found an aluminium factory from ebay. They offered several options for aluminium tube inner and exterior diameters. I managed to find an aluminium insert to my copper pipe that was a 15mm inner diameter but a 20mm outer diameter so I could just add this in when using a different bike.
Thanks for reading and happy axle standing! Feel free to get in touch via the contact page with any queries.

How To Service Cup and Cone Bike Hubs
Cup and cone bearing hubs are found on road bikes, hybrids and mountain bikes. It is more common on modern fairly basic stock wheels however, Shimano use a cup and cone system on all of their hubs.
Cup and cone bearing hubs are found on road bikes, hybrids and mountain bikes. It is more common on modern fairly basic stock wheels however, Shimano use a cup and cone system on all of their hubs.
A decent quality ball bearing or cup and cone hub will last a long time if serviced properly and regularly. Also you may find that as you ride your bike over time your hub needs some re-adjustment to keep your wheels running smoothly but without any annoying wobble!
In this video we show you how to; remove your axle, cone and bearings, properly service the hub and then correctly re adjust the hub tension afterwards.
You need for your cup and cone hub service:
- Grease
- Rag or tissue
- Brake Cleaner
- Cone Spanners
- Magnet
- a Small Pick
- Dish
Icetools make a pretty cool combi style cone spanner set, they aren't the best quality of spanner but good for the infrequent user: https://www.merlincycles.com/icetoolz-cone-spanner-set-44518.html?source=PHG
Trouble Shooting and Tips:
1. On a rear hub it is best practise to start non drive side. This is because you will find it difficult to get a spanner onto the cone on the hubs drive side, it tends to sit inside the free hub body.
2. Most often achieving the correct tension on the cones and bearings is the trickiest part. The idea is to tighten the cone just enough to stop any side to side movement, but also ensure minimal friction between the cone and loose ball bearings so your wheels turns freely. In the video we outline how this is done but bare in mind it does take some practise to get it right.
if you are having any difficulties or just need some further advice do not hesitate to contact us and we will be happy to help… Good Luck